DUE TO CURRENT LUMBER PRICES, THE COSTS MENTIONED HEREIN FOR THIS STRUCTURE ARE NO LONGER ACCURATE. WE WOULD NOT HAVE BEEN ABLE TO DO THIS PROJECT AT TODAY'S INSANE PRICES.
TURN A SHELTER LOGIC CAR SHELTER INTO A SERIOUS WORK AREA
My son bought a 1989 (3rd Gen) Iroc Z Camaro, and we needed a place to work where we could tear the car down, remove the suspension and gas tank, and paint it. We wanted to build a shelter away from the house, in case we blew something up plus car paint odors can be intense. We decided to put a 12' x 20' "portable" garage in the backyard. After searching around the web, we chose a 12' x 20' x 8' high portable garage made by Shelter Logic. The one we bought is really a HAY shelter, ASIN # B002EOX0XY. It cost about 15% more than the same one sold as a car shelter, but it comes with 1-5'8" tubes instead of 1-3/8" or 1-1/2”. It has door flaps at each end which we will need for ventilation when painting, running the engine, etc. We considered going larger to 12' x 24', but we really didn’t have enough room, due to our elaborate septic system.
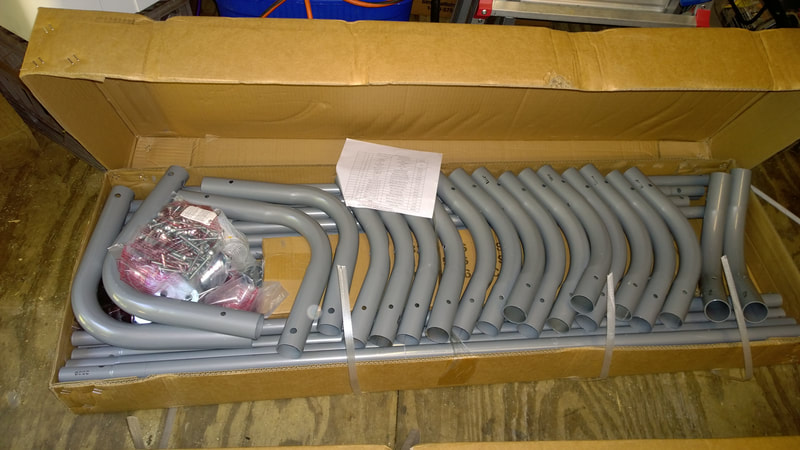
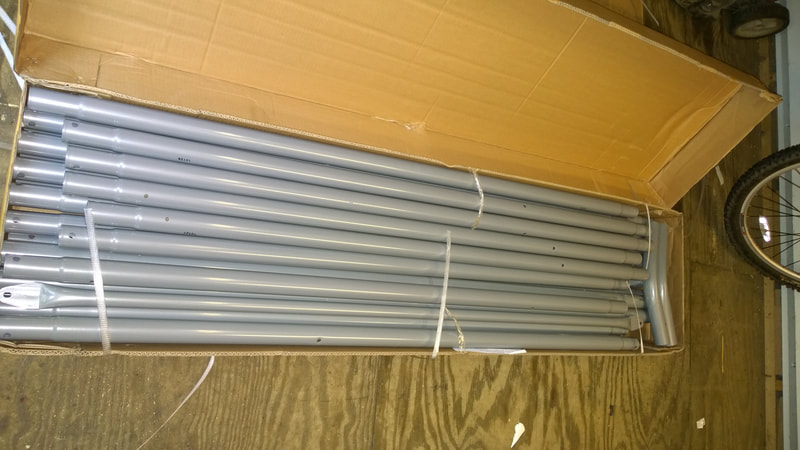
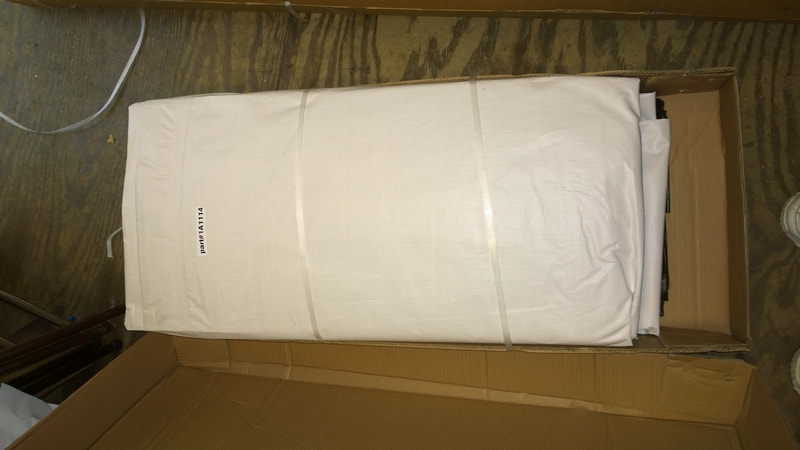
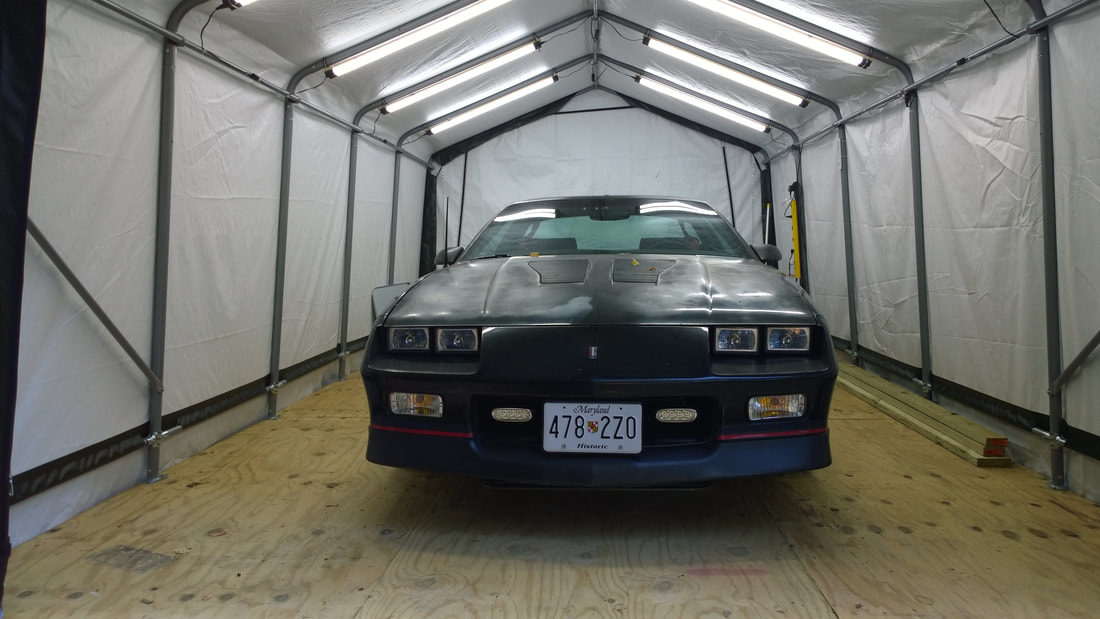
The kit arrived in three boxes: The main support structure, the corners and hardware, and the cover with a separate box with heavy ground screws. Everything was there. The inside of the cover is bright white, which when combined with dual-tube LED shop lights gives us lots of light.
The kit arrived in three boxes: The main support structure, the corners and hardware, and the cover with a separate box with heavy ground screws. Everything was there. The inside of the cover is bright white, which when combined with dual-tube LED shop lights gives us lots of light.
The ground screws are impressive, but we never intended to use them. We’ll keep them for use at the beach, camping, etc. They’re real beefy.
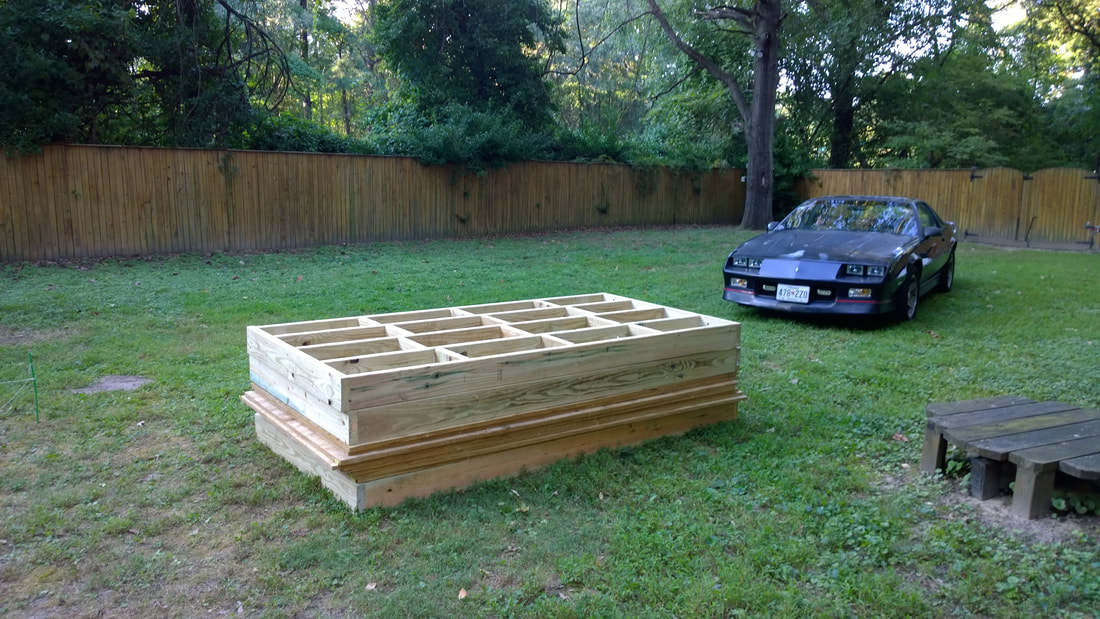
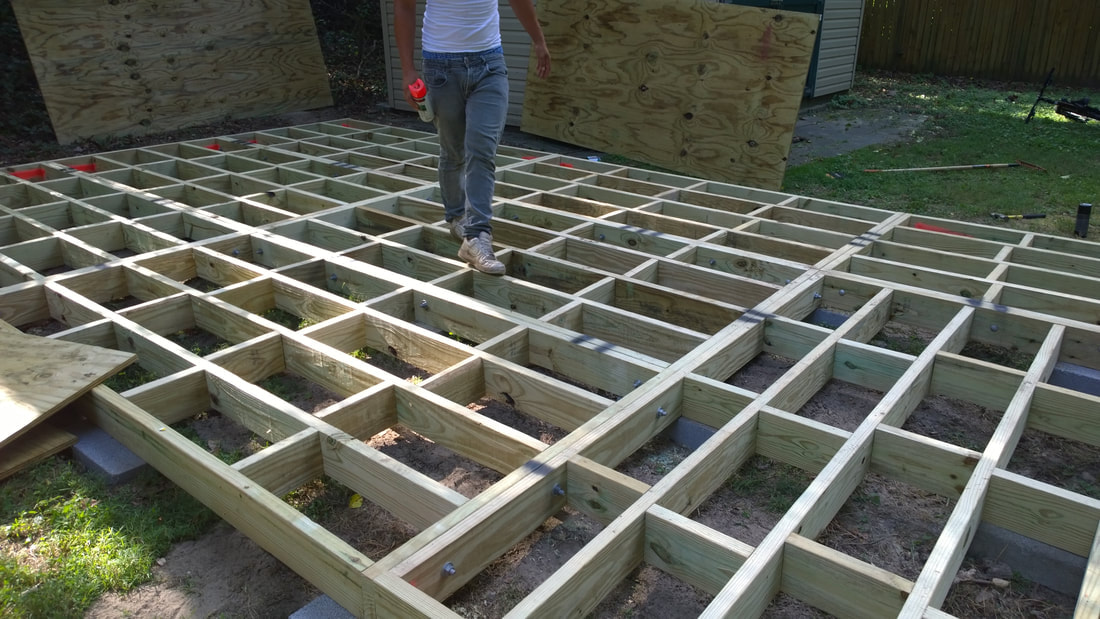
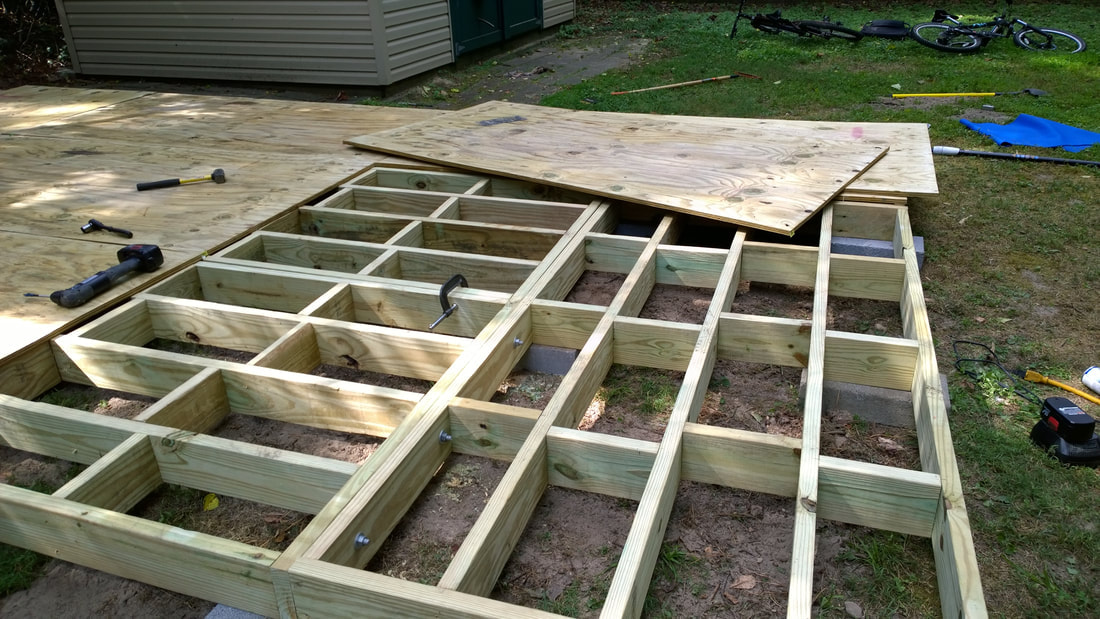
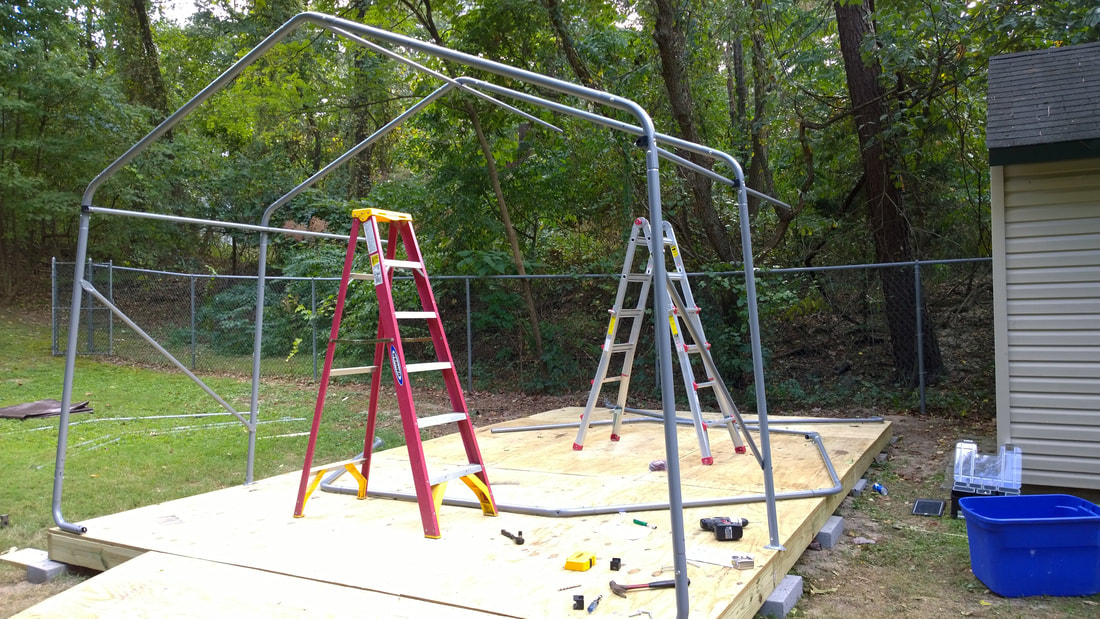
We decided to build a floor system. Concrete was out, because by county code, this had to be a “temporary” structure, and we will want to relocate it in the future. So, I designed a modular floor system consisting of 2 x 6 pressure-treated (PT) lumber, spaced 12-inches on center. To make the floor structure easier to transport by van or truck, I kept the size of each module to 4 ft x 8 ft, with one odd 4 ft square corner module. Each full-size module weighs between 185 and 200 lbs, depending on how “wet” the pressure treatment is. In the picture below, we’re using three modules with the ¾ inch PT plywood floor sheets to keep the sheets from warping before we have a chance to screw them down.
We decided to build a floor system. Concrete was out, because by county code, this had to be a “temporary” structure, and we will want to relocate it in the future. So, I designed a modular floor system consisting of 2 x 6 pressure-treated (PT) lumber, spaced 12-inches on center. To make the floor structure easier to transport by van or truck, I kept the size of each module to 4 ft x 8 ft, with one odd 4 ft square corner module. Each full-size module weighs between 185 and 200 lbs, depending on how “wet” the pressure treatment is. In the picture below, we’re using three modules with the ¾ inch PT plywood floor sheets to keep the sheets from warping before we have a chance to screw them down.
To increase the floor strength and provide a level work surface, we set the floor system on twenty-four, 4-inch thick 8 x 16-inch concrete blocks. We borrowed an electronic transit, and methodically adjusted each one. This part took three hours or more. The modules look uneven below, but that’s a perspective and camera lens error.
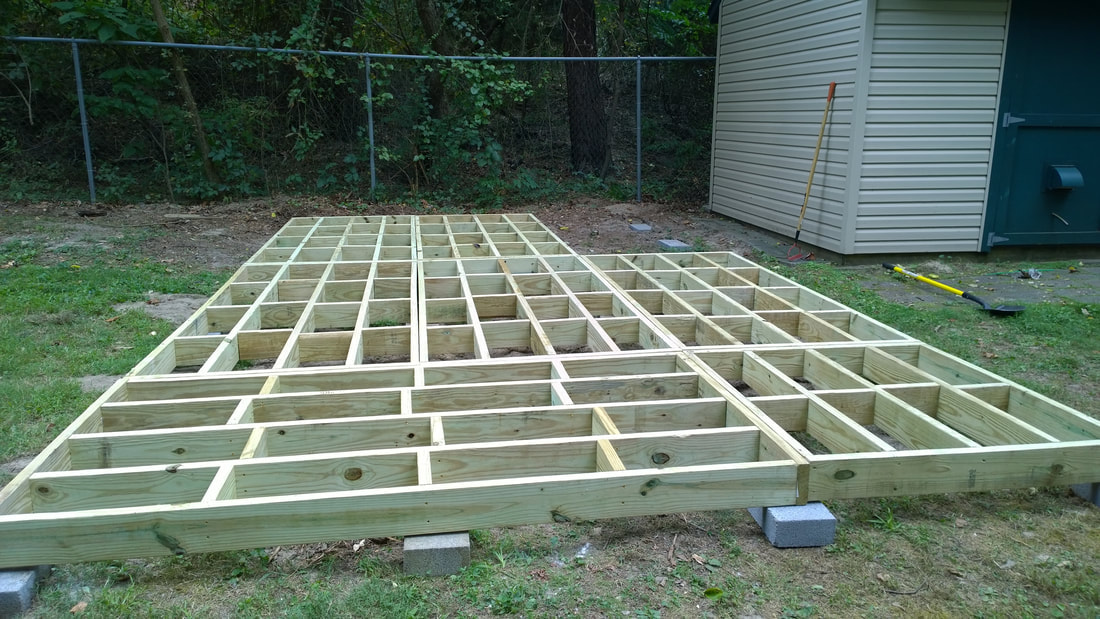
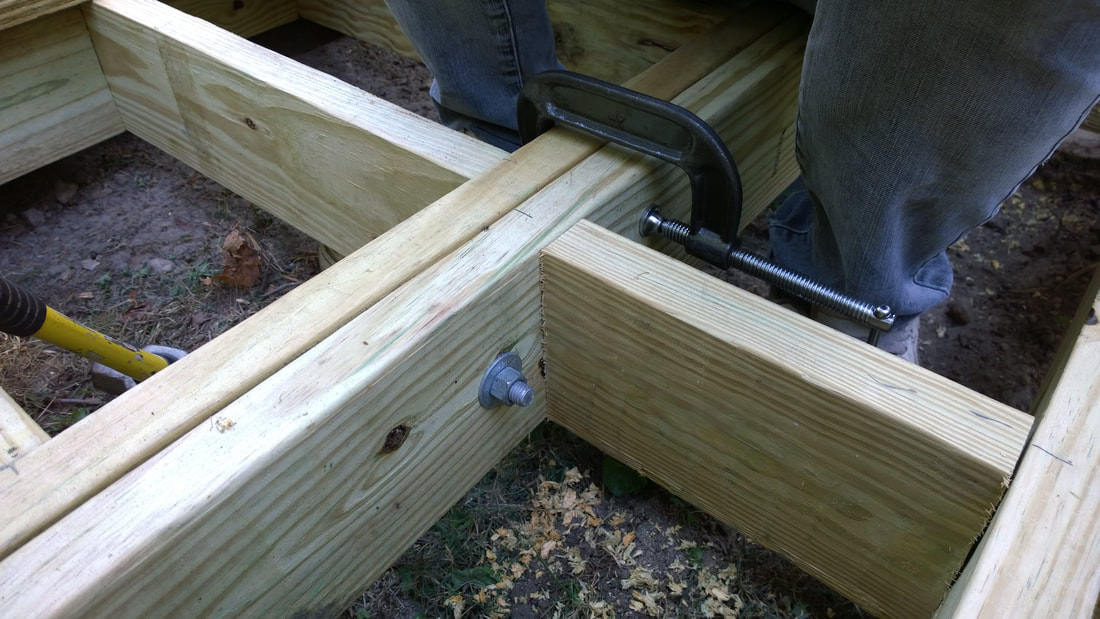
We bolted the modules together using ½ x 4-inch galvanized bolts, and then the sections were marked with paint to make it easier to reassemble later at another location.
I wanted the floor to be as level as possible. If you build up a car using custom control arms and adjustable strut supports, most shops will refuse to do an alignment, or they’ll charge you a custom price. After a lot of research, I bought the Tenhulzen 2-wheel Alignment System (Camber/Caster/Toe Plates).
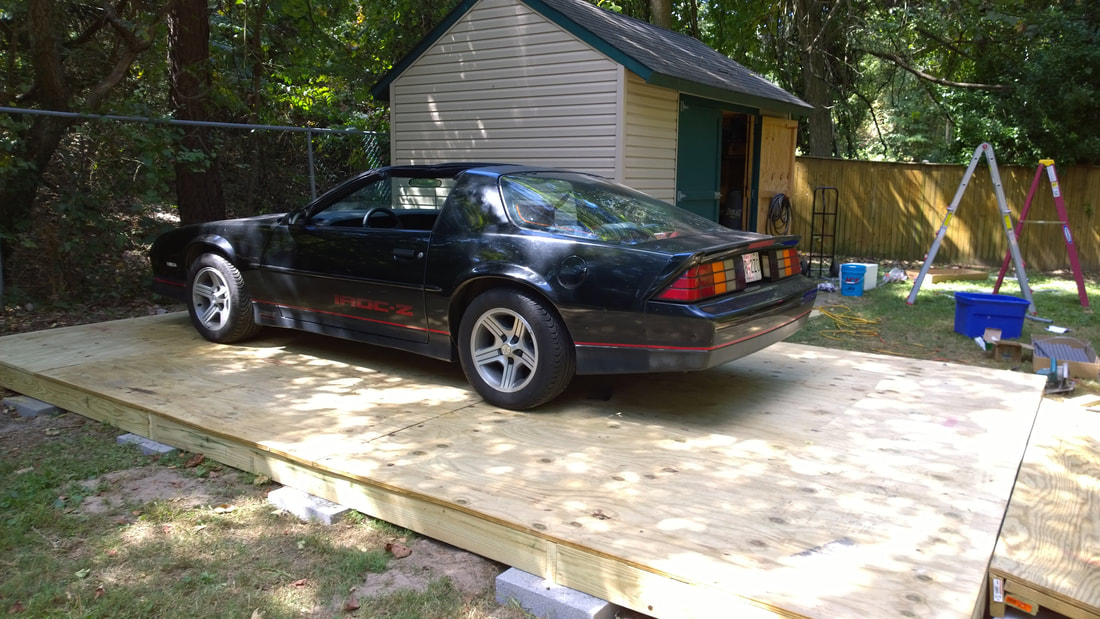
The floor system with the 3/4" PT plywood weighs more than 1700 lbs, and including setting the blocks with the transit, it took a couple days to build, working 4-6 hours/day. Once the floor was complete, we parked the Iroc on it to help the blocks settle. After we were satisfied that it was solid, we started the assembly of the shelter.
The instructions say that two men should be able to put this up in about 4 hours, but that’s with a dirt floor and ground screws. It took us about 8 hours, and naturally, the weather forecast changed and suddenly we were looking at storm clouds and some wind. Be ready for this possibility when you choose a day to assemble one of these structures.
Once you get the front frame pieces together, the rest is pretty easy. The instructions will tell you to completely assemble the frame and all cross members. Then when you put the cover on, you will have to take some of them apart because the pipes need to slip through channels in the cover. It sounds crazy, but it works best.
Putting all the pipes together first assures that your frame will be square, and perfectly aligned. I regret not taking some photos of the frame after we had it all assembled, but we were in a hurry to get the cover on because of the chance of rain.
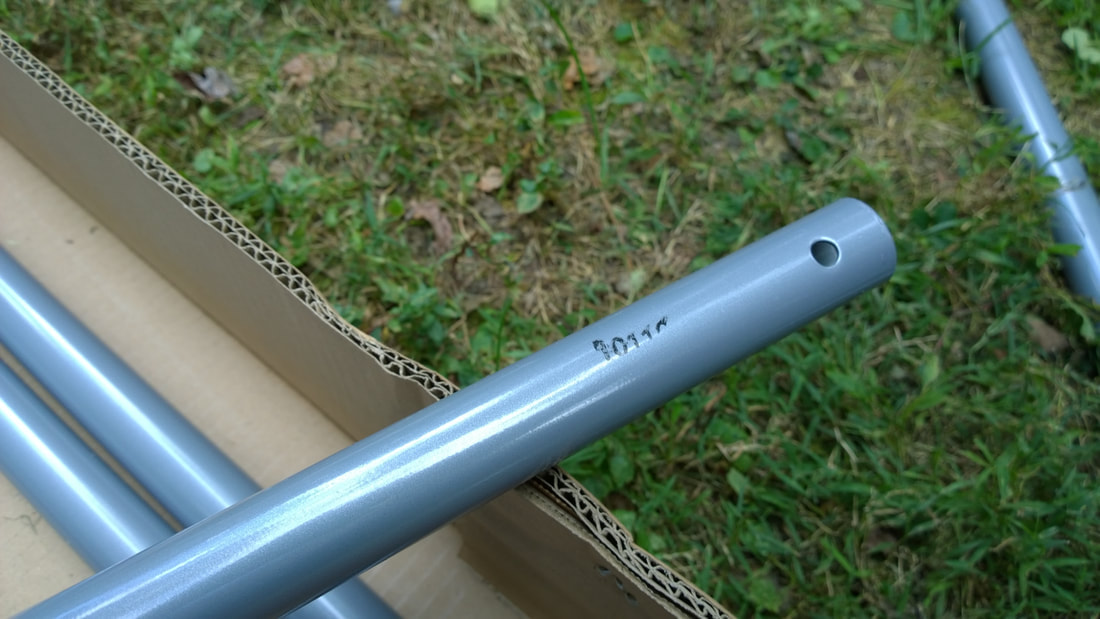
During construction, you might encounter a couple issues. One is that some of the lettering on the tubes may be worn off. I suggest locating one of each pipe with clear markings, setting them on a level surface, and then comparing the length and ends, so you can arrange them in groups.
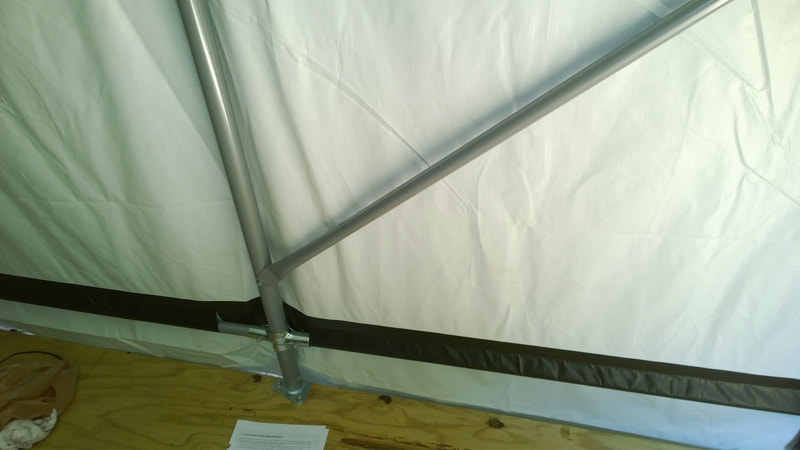
The second issue was that this was designed to work with ground screws around the outside of the structure. The mounting plates are triangular, with one apex aligned away from the center of the structure. We had to carefully bend those over the edge of our platform, or the edges might have cut the cover.
The pipe that is welded to each plate is angled, so rotating them isn’t an option. Go slowly so you don’t break a weld. The alternative was to put the plates entirely on the floor, which might distort the shelter, and it would force us to give up several inches of valuable space.
The pipe that is welded to each plate is angled, so rotating them isn’t an option. Go slowly so you don’t break a weld. The alternative was to put the plates entirely on the floor, which might distort the shelter, and it would force us to give up several inches of valuable space.
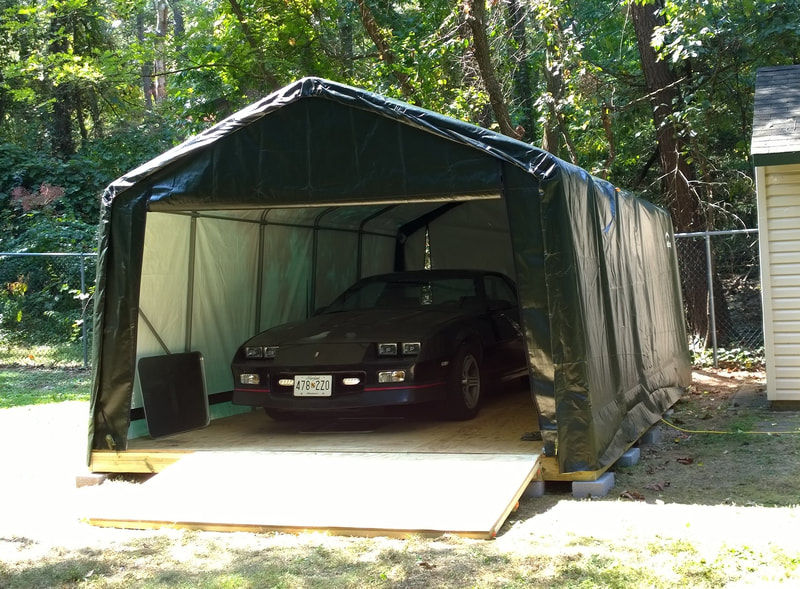
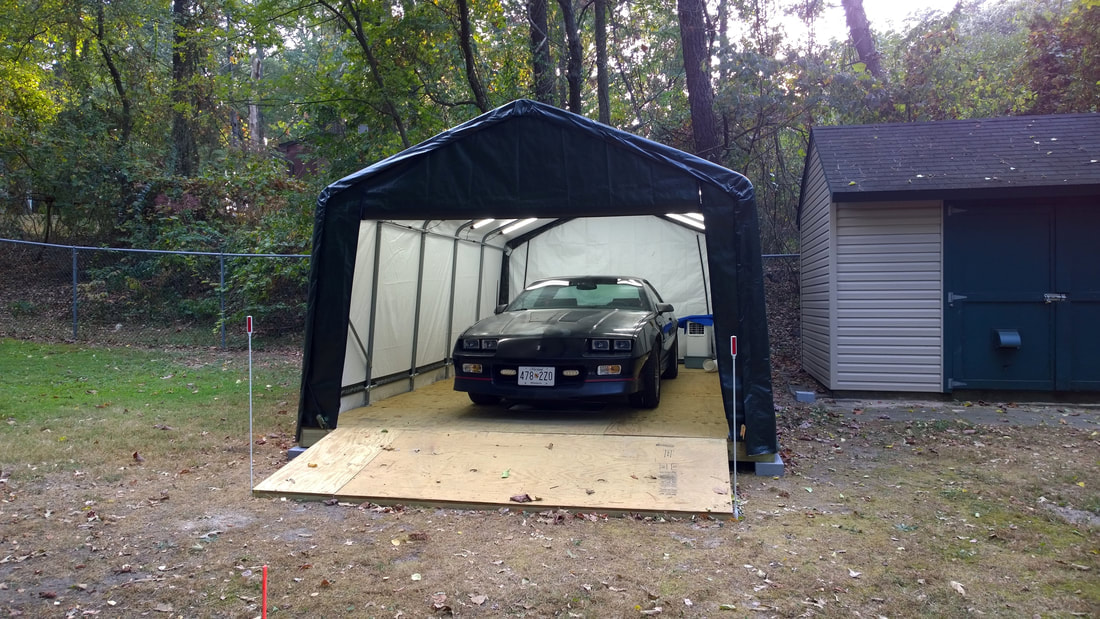
This is what the shelter looked like when finished. The color is a dark green. It’s nice-looking and it blends with the surroundings, which keeps the neighbors happy. Nevertheless, we were already planning to install heavy tarps over this, possibly even something like canvas. The cover is pretty thick - about 18 mils. After I took this picture, we decided to increase the ramp width.
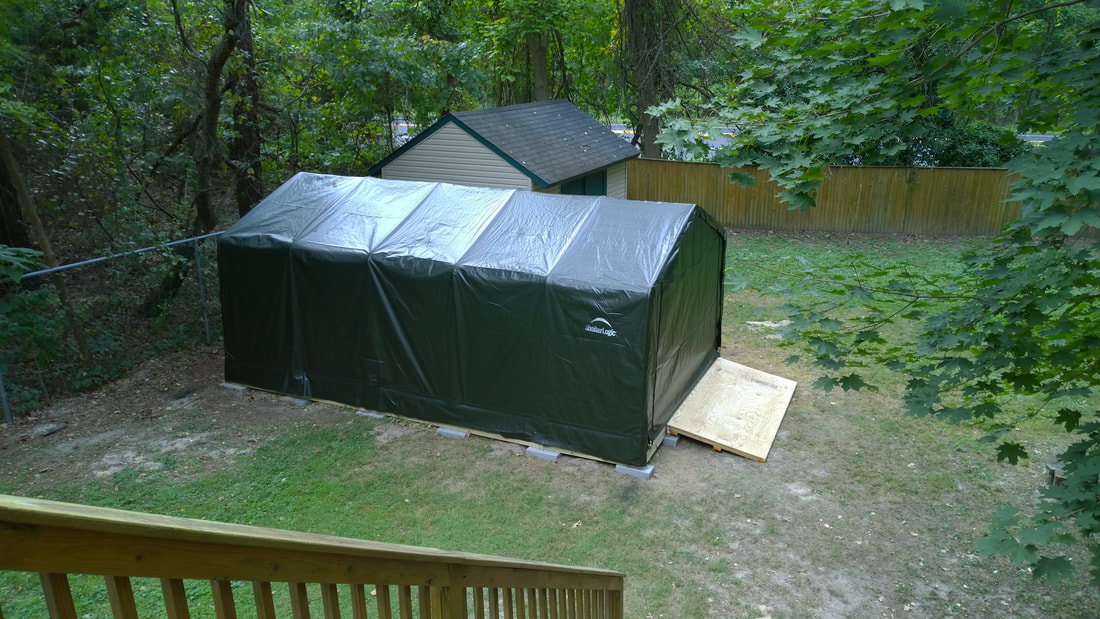
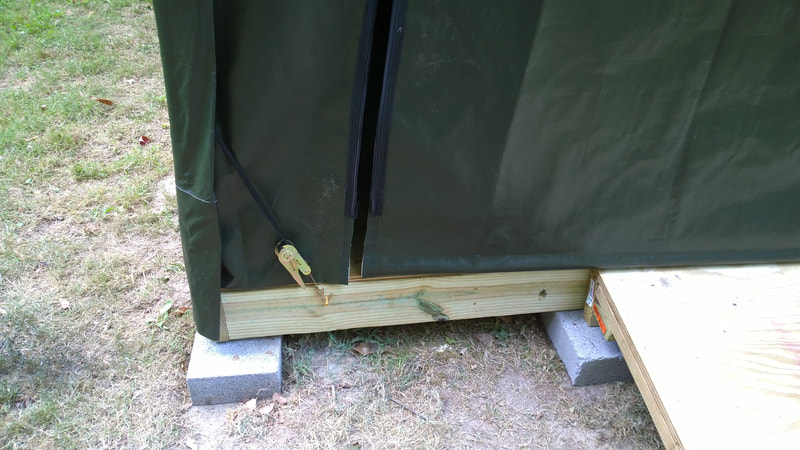
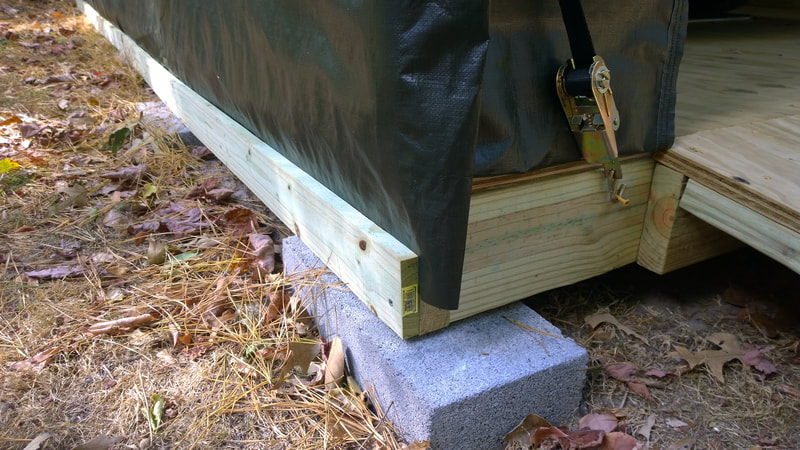
The ratchets that the manufacturer supplies are intended to connect to pre-drilled holes in the front frame members, but if you use a wood base, it will be easier to mount them to that. After everything settled and stretched out, we removed them.
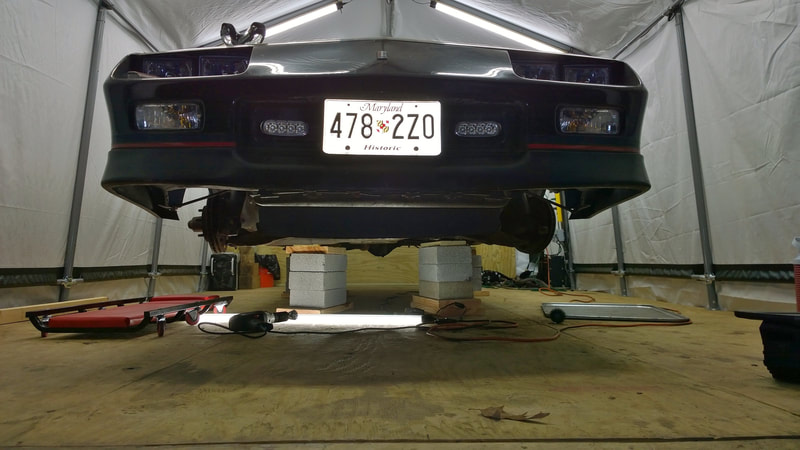
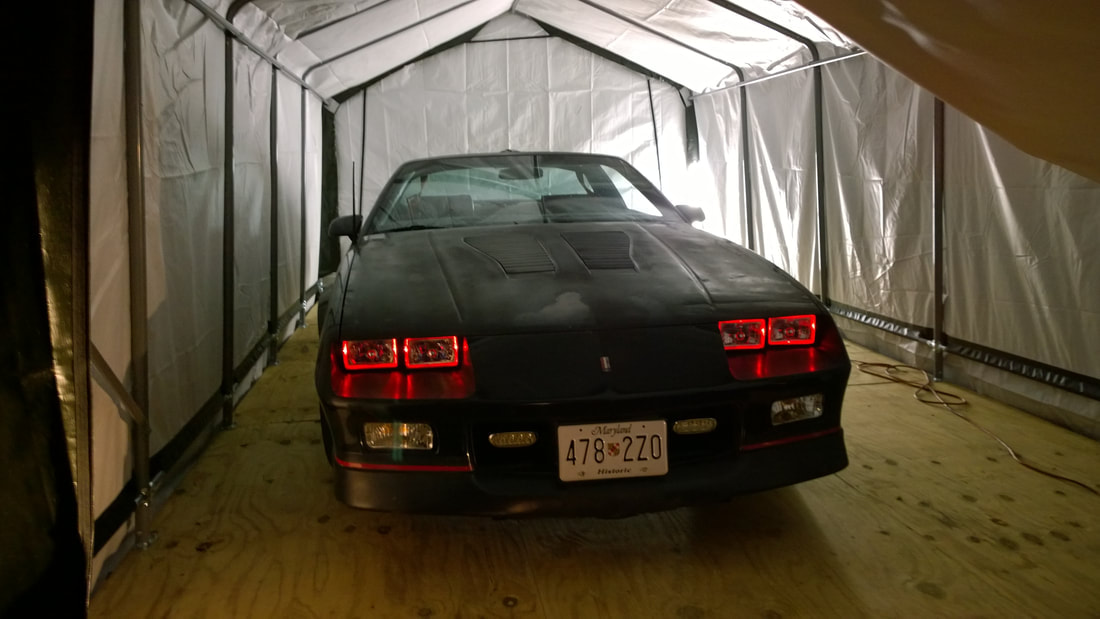
The 12-foot width yields a decent amount of clearance for working on a car the size of a Camaro, and the floor system is more than strong and level enough for floor jacks, engine lifts, and creepers. In the photo below, we had already installed 5000K LED dual-tube shop lights and a Stanley power strip.
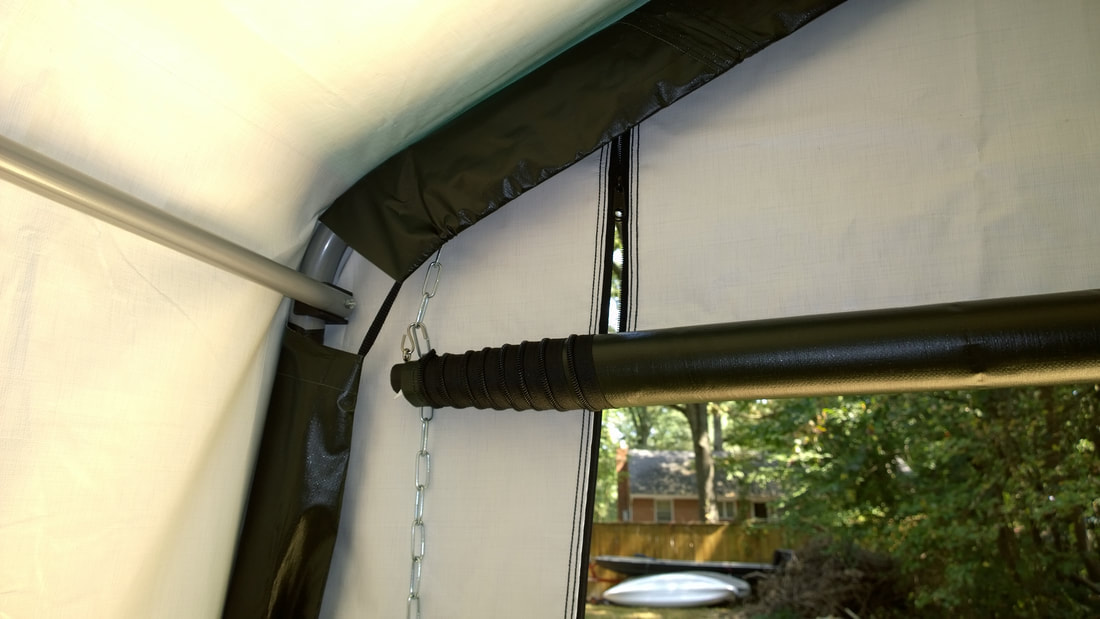
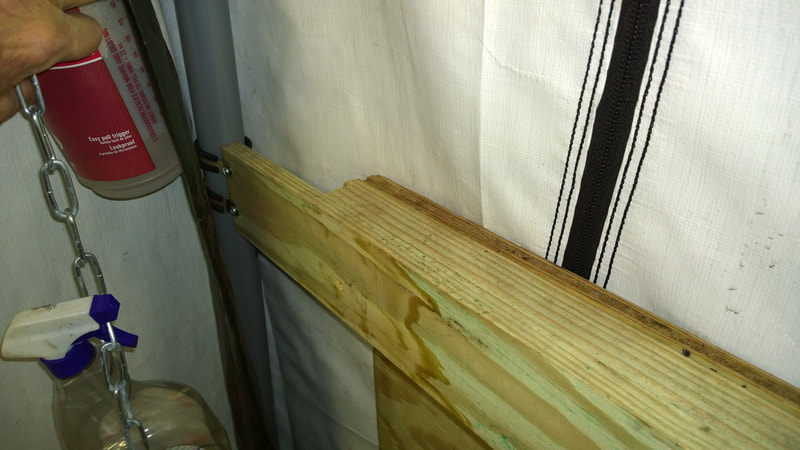
The shelter comes with zipper doors on each end, so you will want door kits. You can buy some with plastic pulleys, or you can make your own. Making your own may prove to be more expensive, but stronger. I bought 10-ft long, 1-1/8-inch diameter dowel rods and painted them to prevent rot. They don't come in pressure-treated style, or at least I couldn't find any. I then drilled them for SS eyelets and hooks. They connect to chains that I hung down inside each end of the front covers. The chains bolt to existing bolts that form part of the frame. The idea is that you can hand roll the door up to virtually any height for ventilation, etc.
There are other improvements that you will want to make. Since this was designed to sit on bare ground, the flaps on each side of the cover won’t hang down far enough on the wood base to prevent wind from blowing leaves and other crud into your workspace. I contacted Shelter Logic by email to see if I could install pressure-treated 1 x 4’s along each side to pin the flaps down without voiding their warranty, and they said, “no problem”. They answered within one day. My screws are below the cover’s bottom because I didn’t want to drill through the cover.
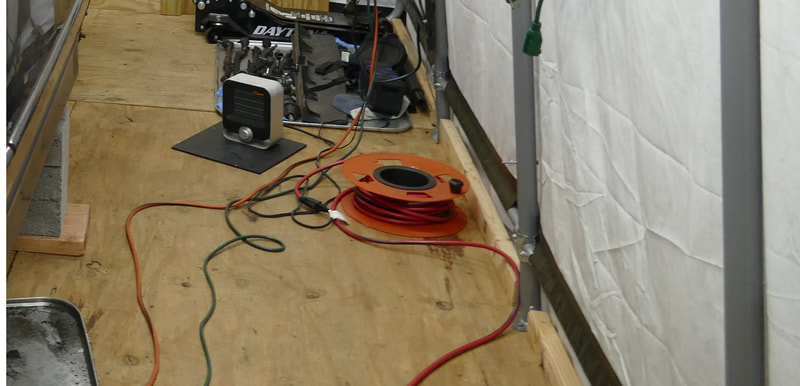
I also recommend installing 1 x 3’s between the support posts as shown on the right to keep things like a creeper or floor jack from pushing against or through the cover.
I also recommend installing 1 x 3’s between the support posts as shown on the right to keep things like a creeper or floor jack from pushing against or through the cover.
Other necessities are electrical power, lights, heat, and in the summer, AC. The power comes from a 12-2 Type UF cable, laid along the ground in 1-in conduit, just under the surface. It’s plugged into a 20-Amp GFCI inside the shed. That reinforces the idea that this is a “temporary” structure. If you live in a rural area, you can probably put up a full load center. We live near Chesapeake Bay, so there’s a lot of scrutiny. In fact, our county website has a link so that people can anonymously turn in their neighbor.
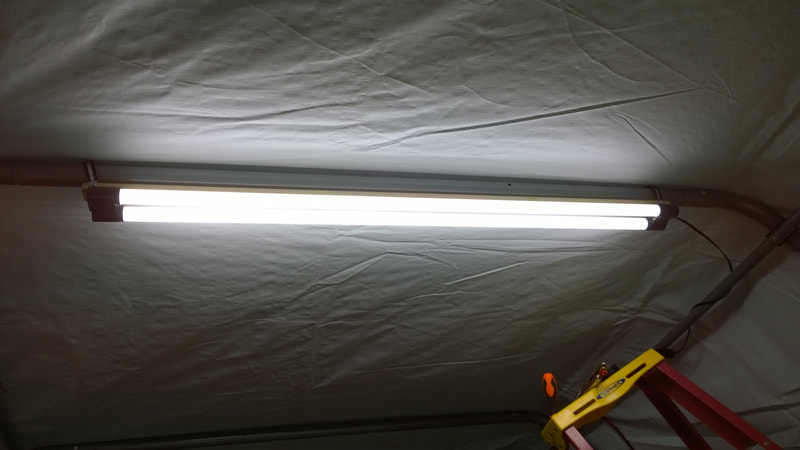
The support tubes have factory-drilled holes at regular intervals, making it easy to mount things. This is how we mounted the lights. The rubber padded clamps are 1.5 inch. The 48-inch LED work lights are Bbounder brand, all from Amazon. I used screws in 1 x 2-in wood strips, with wire ties for added measure. These helped, I think, when a couple large branches hit our shelter.
The support tubes have factory-drilled holes at regular intervals, making it easy to mount things. This is how we mounted the lights. The rubber padded clamps are 1.5 inch. The 48-inch LED work lights are Bbounder brand, all from Amazon. I used screws in 1 x 2-in wood strips, with wire ties for added measure. These helped, I think, when a couple large branches hit our shelter.
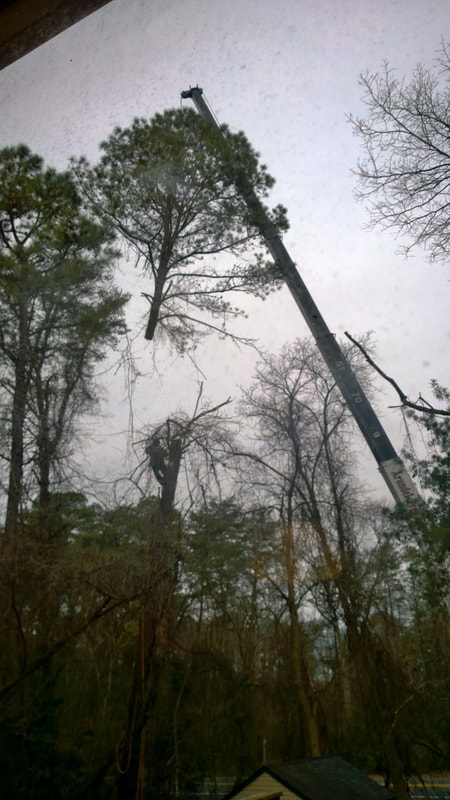
About 6 weeks after we got everything up, a windstorm brought down an old dead tree limb. We don't live on a farm and the only place we could set the shelter was in our back yard. We had 4 or 5 tall trees that hung over our shelter, our shed, and even our house. They were slated for removal but scheduling a large-scale tree removal takes time. Before they could be removed, disaster struck.
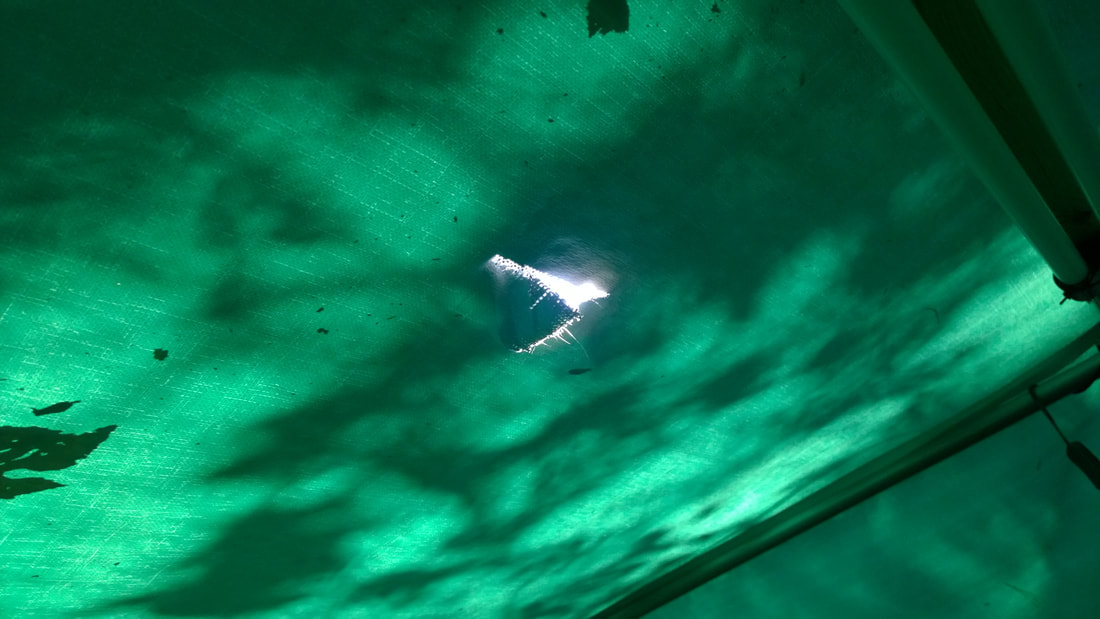
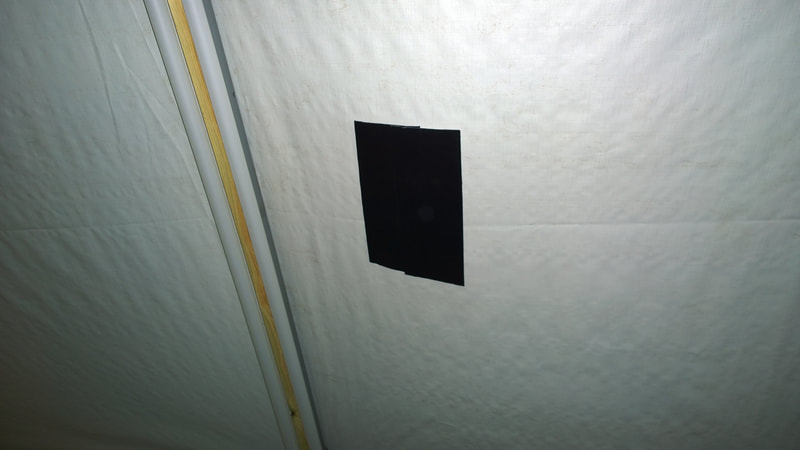
A windstorm came up, and I was there to see it. The branch was about 3 inches in diameter and 8 feet long. It weighed maybe 10 lbs. Naturally, it hit end first and did this. Surprisingly, it bounced off - just some pieces of bark were inside. Gorilla makes a 4 or 5-inch swimming pool liner tape for this sort of damage that can be applied under water. It did a great job of patching this hole. I put the tape on the outside and inside of the OEM cover, even though the hole would soon be covered, anyway.
A windstorm came up, and I was there to see it. The branch was about 3 inches in diameter and 8 feet long. It weighed maybe 10 lbs. Naturally, it hit end first and did this. Surprisingly, it bounced off - just some pieces of bark were inside. Gorilla makes a 4 or 5-inch swimming pool liner tape for this sort of damage that can be applied under water. It did a great job of patching this hole. I put the tape on the outside and inside of the OEM cover, even though the hole would soon be covered, anyway.
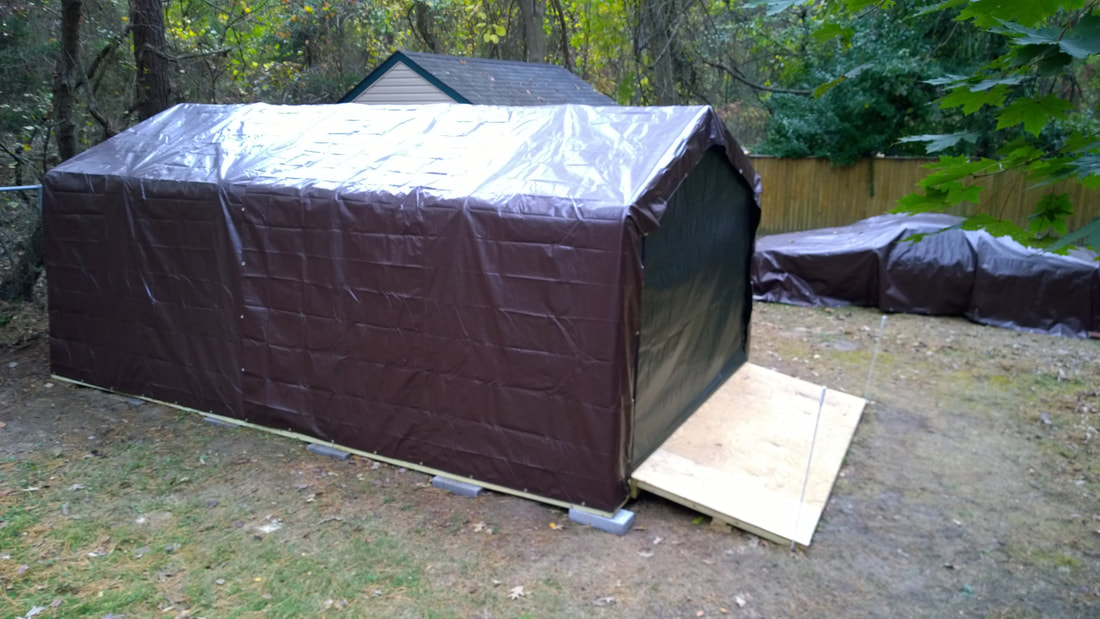
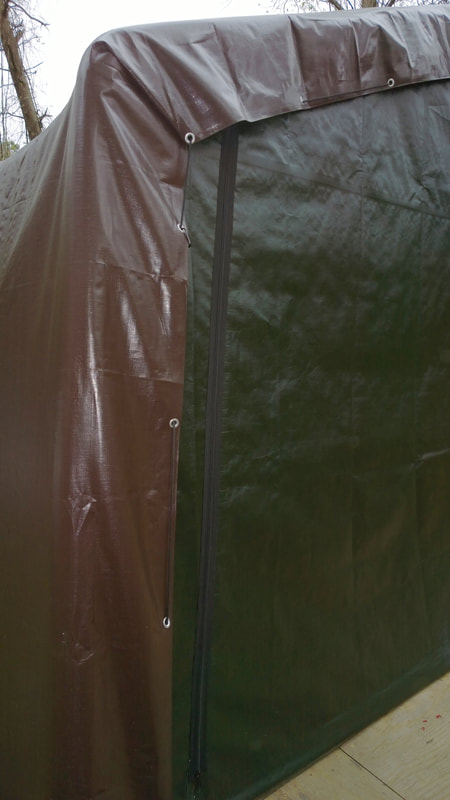
We were already planning to put something over the original cover, so for extra protection, we pulled several 16 mil tarps over the factory cover. We used multiple tarps overlapped by 4-ft so if one gets damaged by a tree branch, we don't have to buy a large and expensive replacement. A company called Harpster sells very thick tarps whose measurements are exactly as stated on the box. Their 12 ft x 25 ft model was perfect. The specific model was $67.49 from TarpsDirect on Amazon.
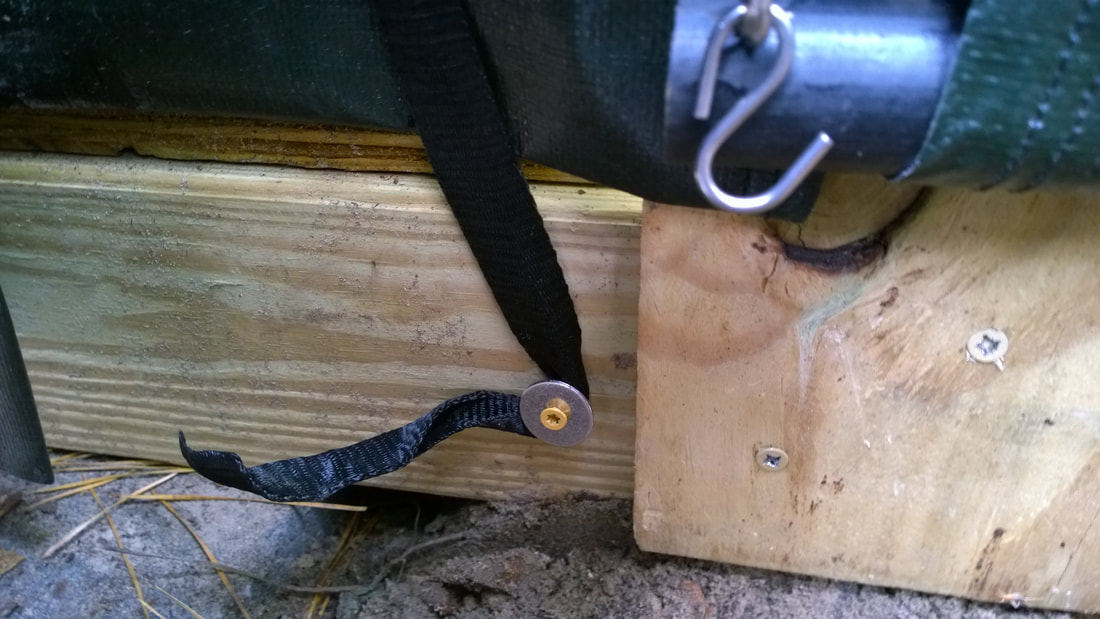
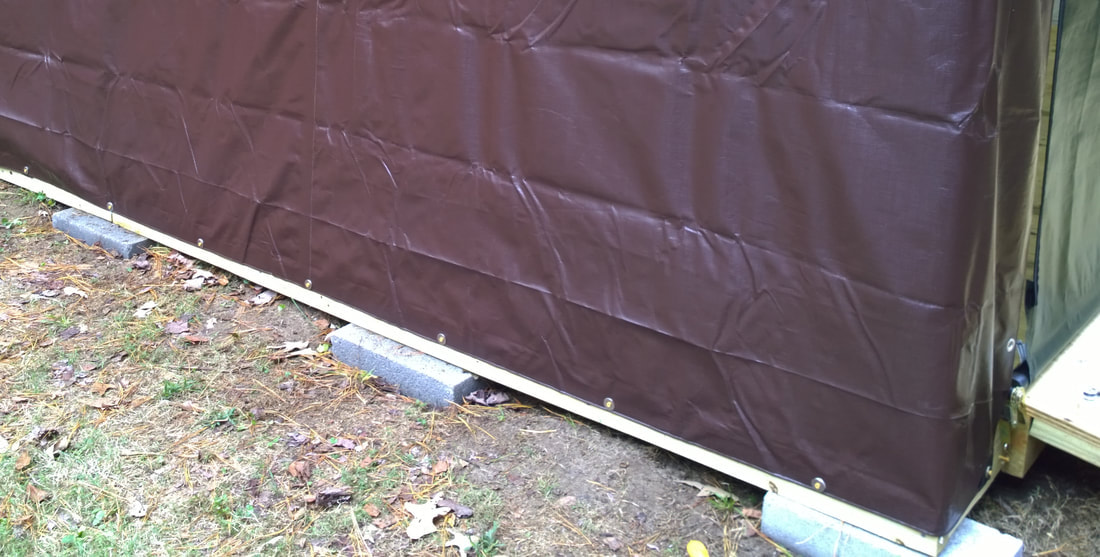
We used 2-inch coated deck screws and 1-inch stainless fender washers to secure the tarps to the base. The grommet spacing was very precise on two out of three Harpster tarps, but the third had a couple that were a little off. Still, the extra covers give the shelter a clean appearance, and they dramatically increase the protection level. During the tree removal process, two large branches broke off and came cascading down from 30 or 40 feet up. One hit sideways on a frame member and broke up, but the second hit end first. Neither caused damage to the covers, nor did the impacts shake loose or damage our shop lights.
Note how we overlapped the front and rear ends of the structure, stringing paracord through the eyelets so we could pull it over tight just like the original cover.
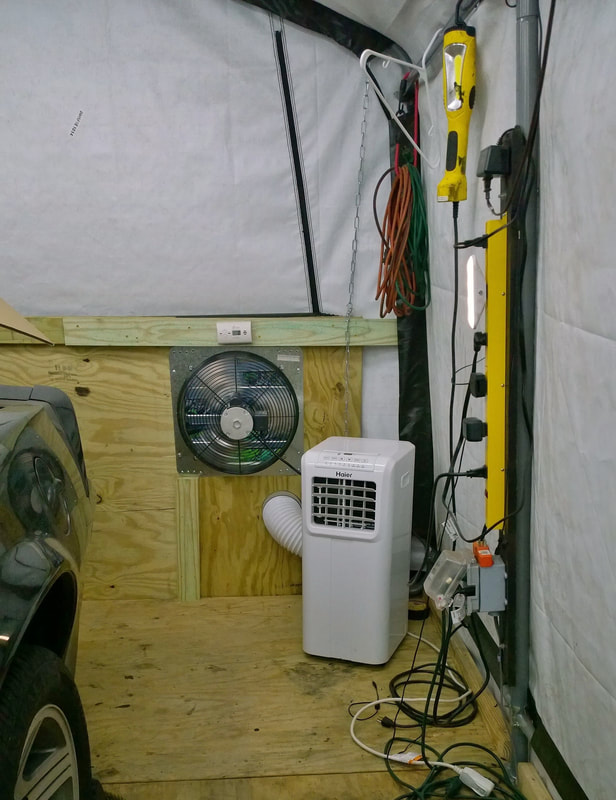
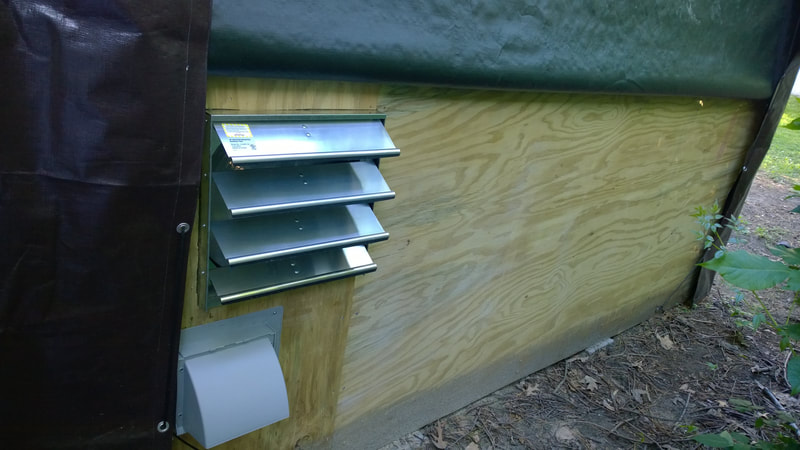
One other improvement was a wood back panel. The panel is a 4’ x 8’ piece of ½” PT plywood. Since that wasn’t long enough to span the entire back of the structure, we added a 2’ x 4’ piece and spliced it to the main one using a 2” x 4” PT board. This back panel holds an automatic fan with louvers for paint vapors, and a downturned outlet for a Haier portable AC unit. We used the same 1.5” clamps that we used for the lights to support the top of the backboard to the frame rail. The rear cover drops down behind the back panel and zips when we’re not in the shelter.
The pictures below show how we installed the air conditioner and the ventilation fan. A hose from the back of the AC unit drains condensate water outside, which prevents the dreaded “tank full” message and AC shutoff. Before we paint the car, we’ll put a speed control on the fan and a filtered vent to bring air into the shelter. Right now, we only run it when the front is open. The fan and vent came from Home Depot (ordered online). We don’t run them at the same time.
We’re very happy with the results from this effort. The shelter gives adequate room for working on a car, and even painting. Here’s some additional information:
PROS:
CONS:
- The cost of the Hay shelter was $699, and the flooring system was about $800, for a total of around $1,500. NOTE: Lumber prices have TRIPLED in our area since we built this due to the COVID pandemic.
- The lights came in packs of 10 for $160 on Amazon. We mounted eight and used two as “floaters”. These have a Kelvin temperature of 5,000, and they’re very bright. All the ones we mounted are still working great, over a year later. The floaters made great work lights, but eventually they got stepped on and crushed.
- The 1 ½” 304 Stainless clamps also came from Amazon. We bought 30 for the lights and other accessories.
PROS:
- Makes a convenient and comfortable work area, without the cost of a garage. In most areas, you won’t need permits.
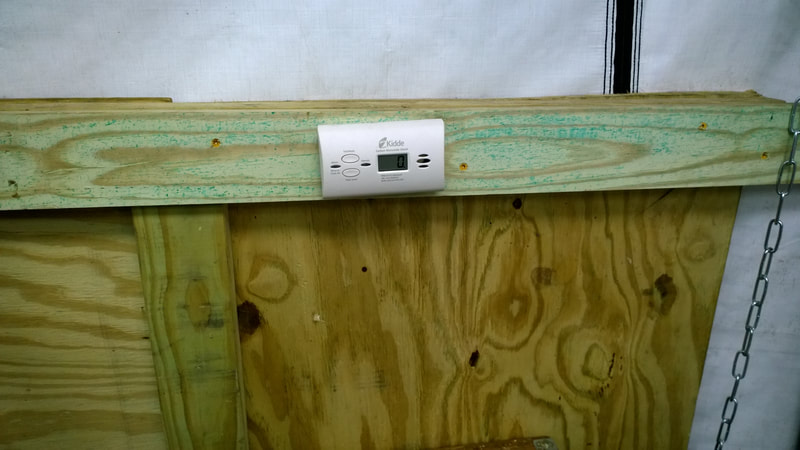
- The sun warms the shelter in the winter. Once it goes away, you will need heat. We use a shop style electric heater, and to get the temp up quickly, we use a Big Buddy propane heater that goes up to 18,000 BTU. We installed two CO sensors with LCD screens, but they didn’t even register with the propane heater going. When we start the car, even with both ends open, those monitors go crazy.
- This is a temporary structure, so it can be moved. If your local gov’t pays you a visit, you can probably win your case because it’s modular and it doesn’t require a full depth foundation.
- If you paint and get overspray on things, no problem. If you do that in your home’s garage, it’s a different story.
CONS:
- Not as solid as a wooden structure, obviously, but it’s cheaper to build and repair if necessary.
- Sound goes right through the covers, so everyone around will easily hear your conversations. I think the covers act like drumheads, so they amplify sound. If you’re married, don’t go out to the shelter to call your girlfriend.
- A heavy rain will make conversation inside a little difficult. NOTE: I'm planning to buy rolled swimming pool liner insulation and put it between the covers for sound and temperature control. It comes in 1/8" and 1/4" thicknesses, on 4' x 125' rolls. I'll provide an update on this.
- THE SUMMER SUN WILL TURN THE SHELTER INTO AN OVEN. SEE BELOW:
THE SUMMER COVER
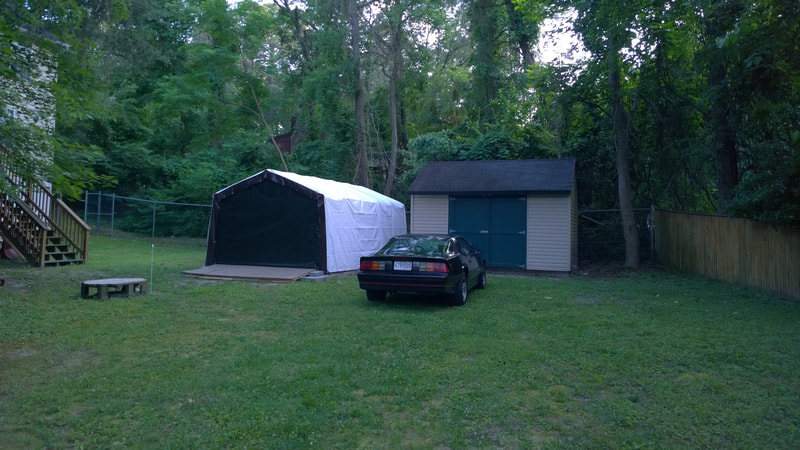
The first 95-degree day was a shock. Without the shade from those big trees that were removed, the temperature inside the shelter was over 100 degrees. The inside surface temperature of the cover was approx. 140 deg. Opening the front cover and running the fan dropped it to the low 90’s, but we still couldn’t work. The humidity here on the east coast added to the misery. It was time to pull over a lighter cover. I wasn’t wild about white, but it’s the most effective color against the sun.
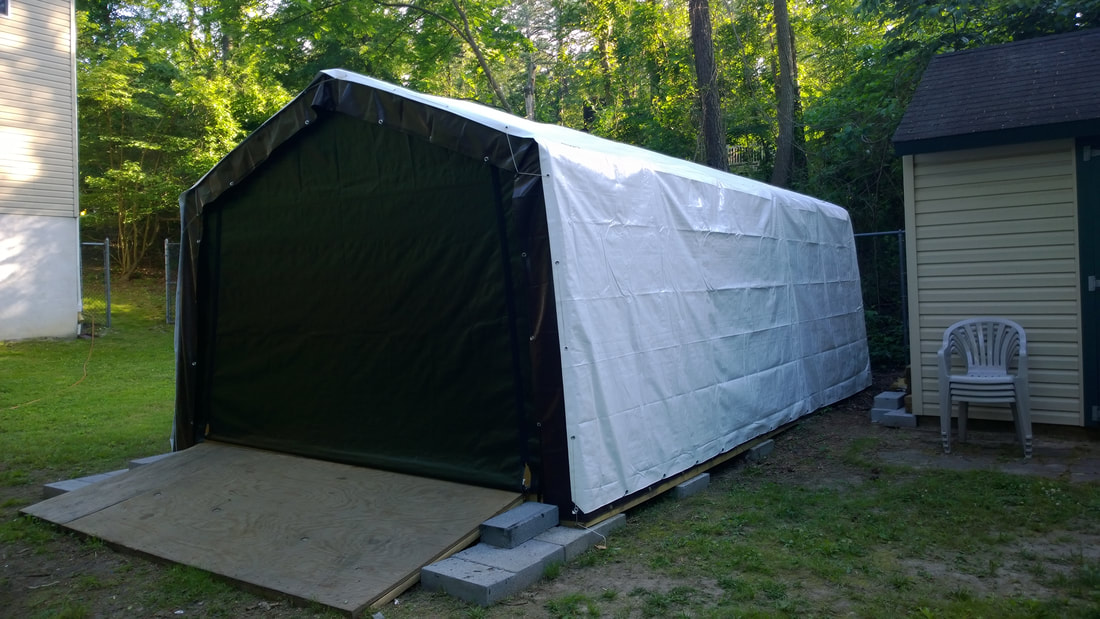
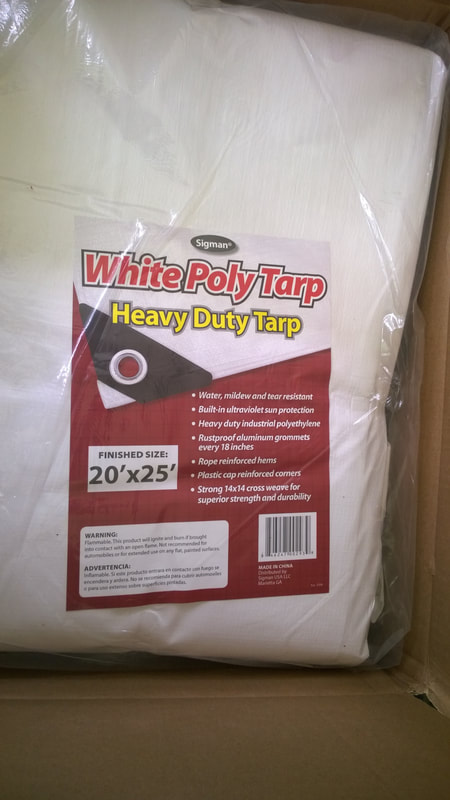
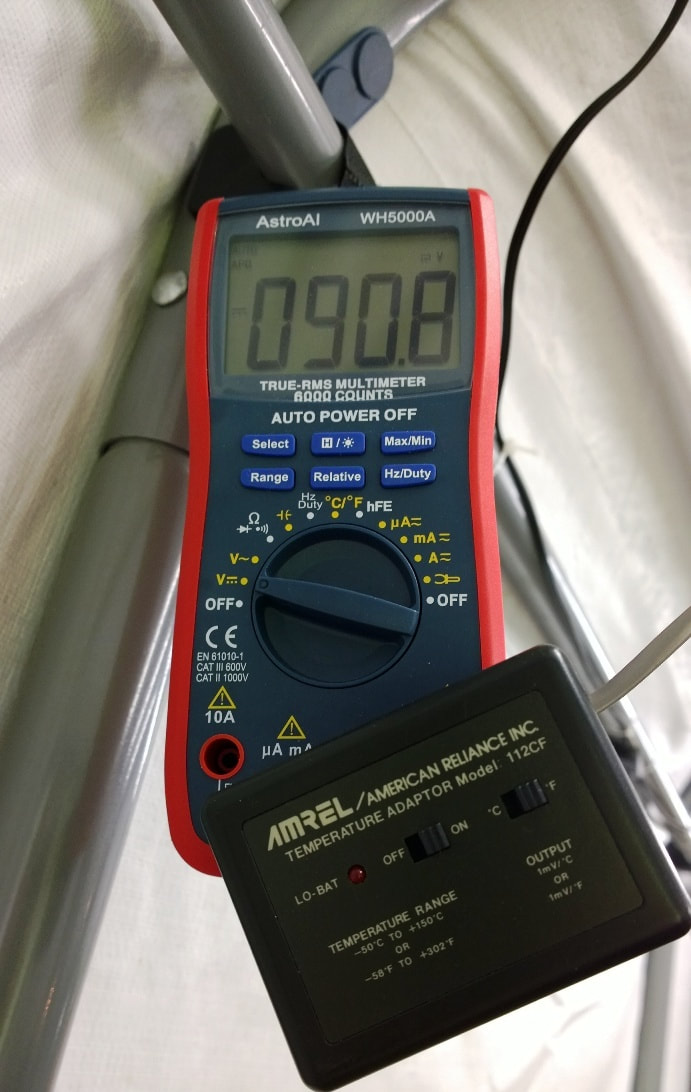
Once again, we went to Home Depot. They had a nice thick cover by Sigman. The finished dimensions slightly exceeded those shown on the package, which allowed us to wrap the cover around both ends. As soon as we pulled the white cover over, the temps fell dramatically. The inside surface temp went from nearly 140 degrees down to 91. By 4:00 in the afternoon, we were able to close the flaps and use the AC. On a sunny 90+ degree day, we can work on the car in 78 to 80-degree temps with 50-60% humidity. By late afternoon, it’s cool enough inside to paint.
Below left: The inside cover temperature before and after we added the new white tarp.
Below left: The inside cover temperature before and after we added the new white tarp.
GROUNDHOGS AND OTHER VERMIN
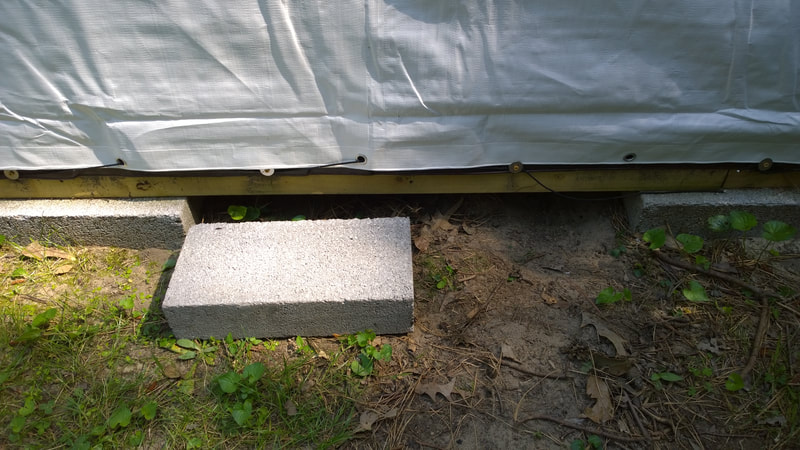
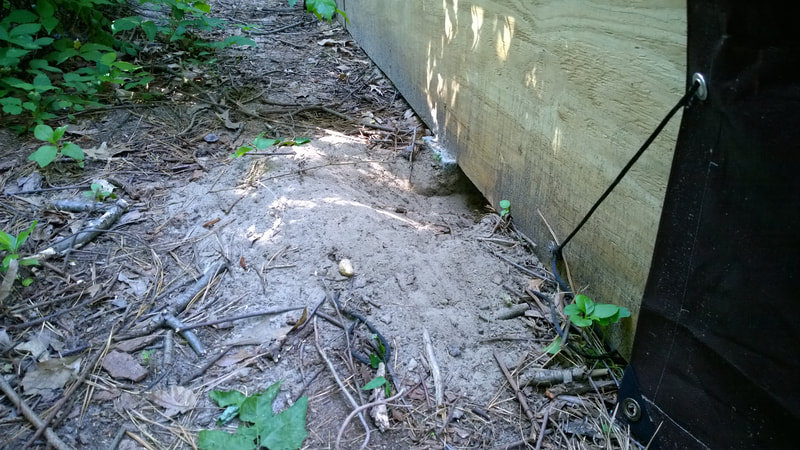
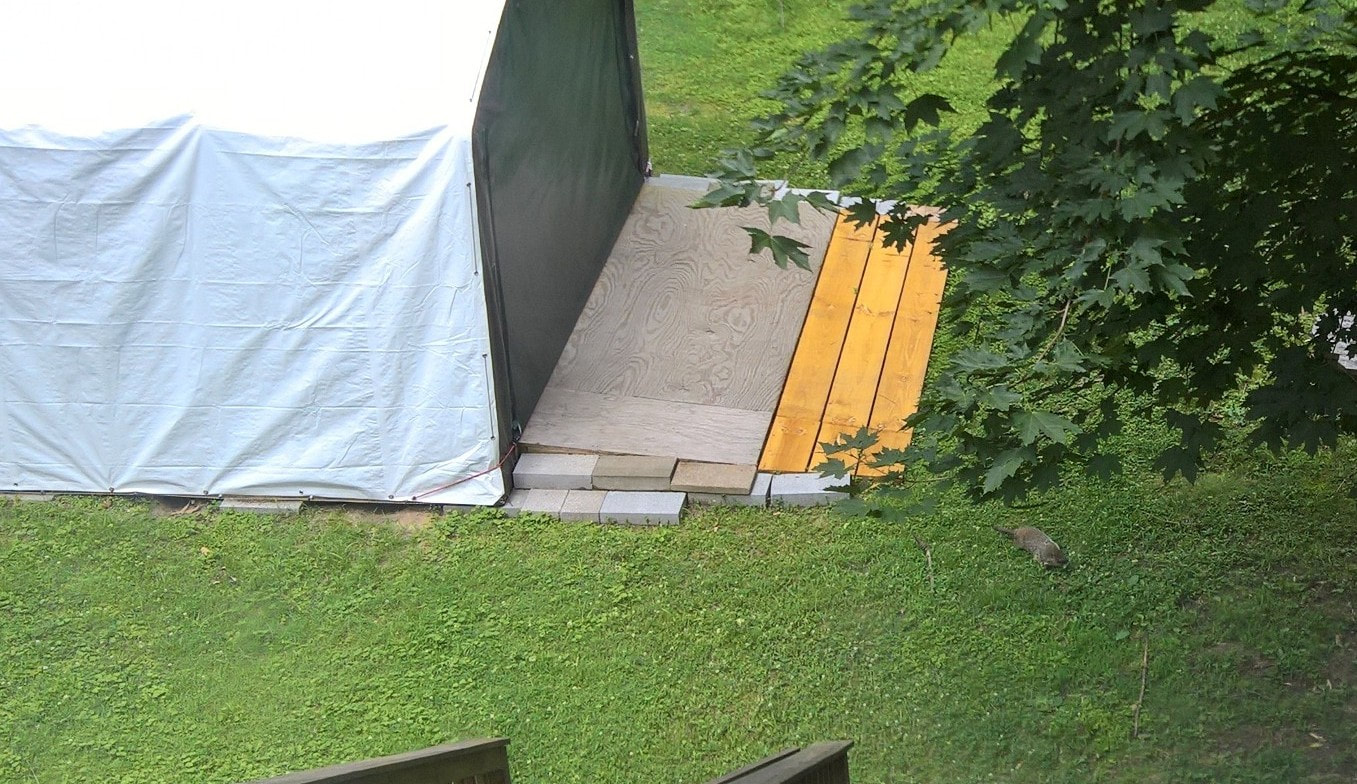
After all the work we did leveling the foundation blocks, the LAST thing we wanted to see was a groundhog – or TWO, in this case. I looked out and saw one staring out at me from under our base. Naturally, they went right for the foundations. I was furious. When blasting Led Zeppelin under the floor failed to drive them out, I baited and trapped them, but I knew this would be an ongoing problem. I needed a solution that would keep digging animals at bay and that could be left on indefinitely without risk of fire.
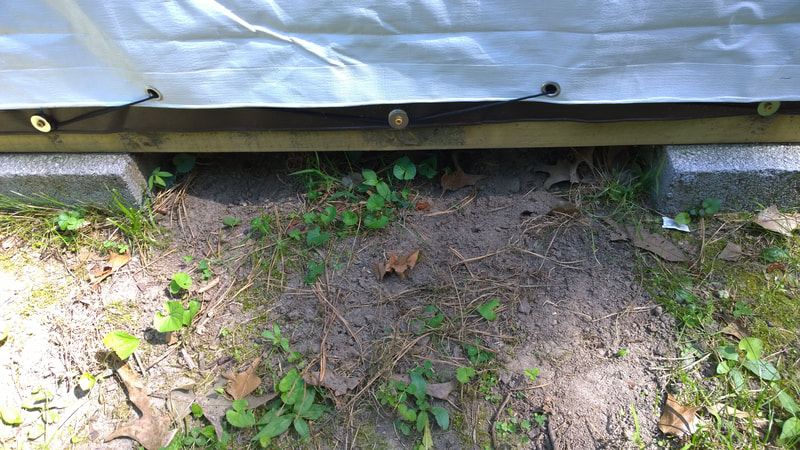
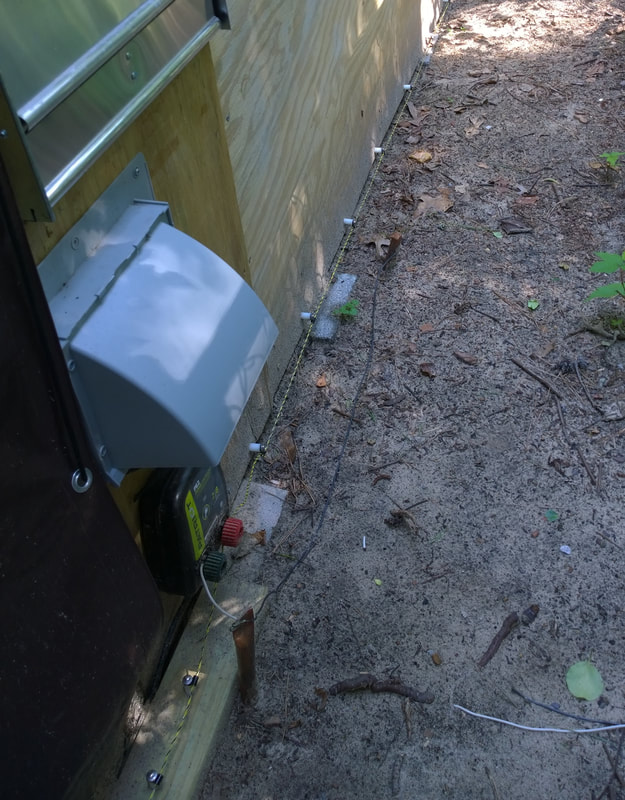
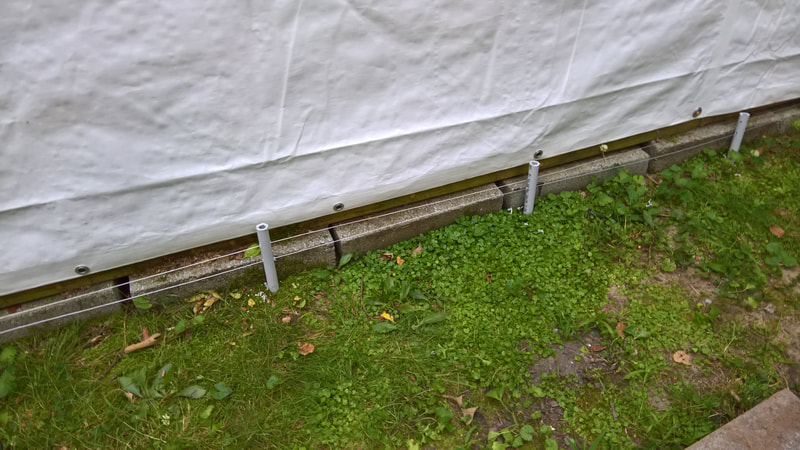
Back to Amazon. I bought a 2-mile range electric fence controller, a spool of Polywire, insulated spacers, and SS screws. The idea was to get the wire as close to the ground as possible without grounding out the system. This has worked very well. Some pictures are below. The critters dug under the base in 5 or 6 locations, so blocking all the spaces with concrete blocks was pointless. NOTE: The system below failed to stop all groundhogs, so I changed the system. Details below.
Back to Amazon. I bought a 2-mile range electric fence controller, a spool of Polywire, insulated spacers, and SS screws. The idea was to get the wire as close to the ground as possible without grounding out the system. This has worked very well. Some pictures are below. The critters dug under the base in 5 or 6 locations, so blocking all the spaces with concrete blocks was pointless. NOTE: The system below failed to stop all groundhogs, so I changed the system. Details below.
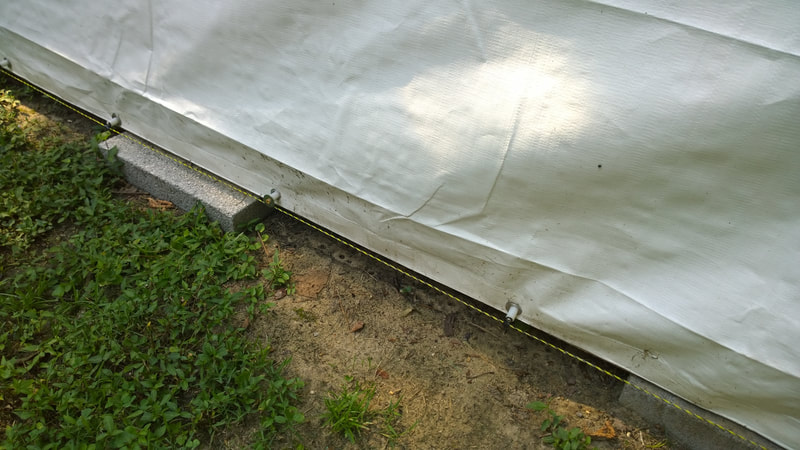
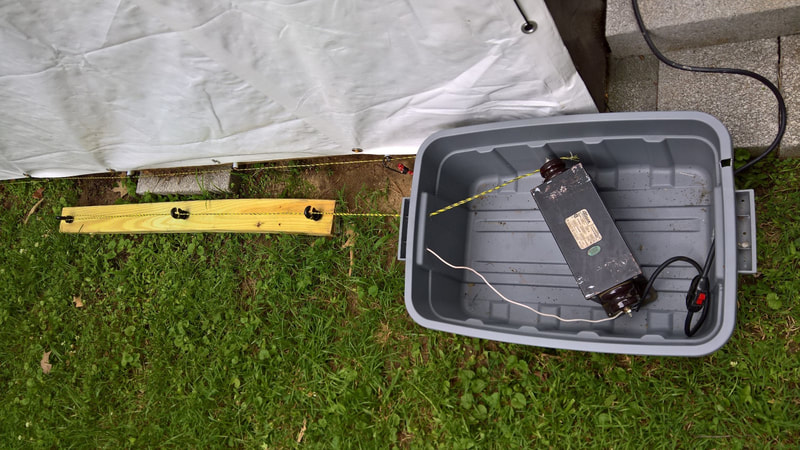
I installed the wire on plastic standoffs with long SS screws, using the tarp holes. Standard aluminum or SS electric fence wire is cheaper than Polywire, and if I replace it someday, I may choose one of those two other options. The 5,000-volt charge controller delivers a startling jolt. Not as strong as a neon sign transformer, but then it won’t start a fire, either.
Since installing this system, an animal of some sort apparently started digging and got scared off by the jolt. So now we’re finally happy.
NEW DESIGN
THE ABOVE SYSTEM KEPT CRITTERS AT BAY FOR OVER A YEAR, BUT A DETERMINED FEMALE GOT THROUGH, FORCING A RE-DESIGN. THE LITTLE TRAMP ALREADY HAD A MATE. AS A TEMPORARY MEASURE, I SET UP A NEON SIGN TRANSFORMER, CONNECTED TO A REMOTE SWITCH. WHEN THE TWO LOVEBIRDS WERE OUT IN MY YARD EATING, I ACTIVATED THE TEMPORARY SYSTEM. WHEN THEY TRIED TO CRAWL BACK UNDER THEY GOT NAILED. THEY BOLTED OUT OF OUR YARD TO PRESUMABLY FIND ANOTHER HOME.
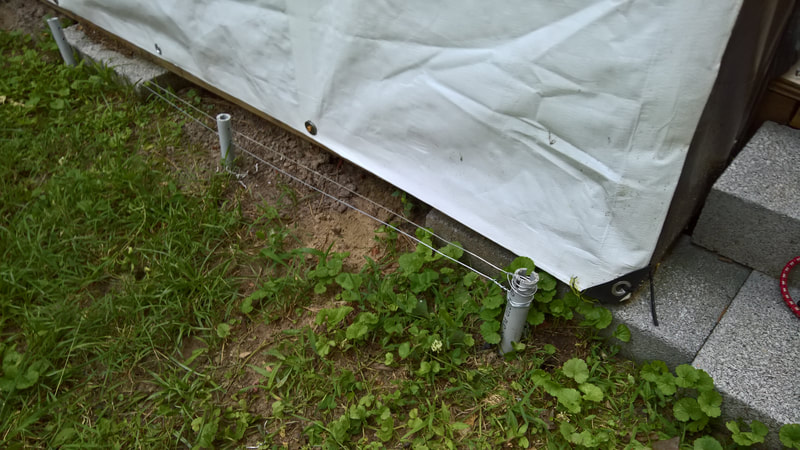
THE LAST TWO PICTURES BELOW SHOW THE NEW STUFF. I SWITCHED TO 17-GAUGE ALUMINUM WIRE, AND A 10,000 VOLT, 2-JOULE CHARGER SOLD ON AMAZON UNDER THE NAME AgriOTTER. THE LITTLE 5,000-VOLT, 0.1 JOULE PATRIOT CHARGER WASN'T STRONG ENOUGH. A JOULE IS JUST A WATT OF POWER PER SECOND, MEANING THAT THE PULSE DELIVERED BY THE OLD CHARGER WASN'T LONG ENOUGH TO GET THE JOB DONE. THE AgriOTTER FENCER IS EXTREMELY POWERFUL. IF I TOUCH THE WIRES I GET A VERY PAINFUL JOLT. I COULD HOLD ONTO THE WIRE WITH THE 0.1 JOULE SYSTEM. THE BEST THING IS, THE AgriOTTER FENCER CAN RUN OFF A 12-VOLT BATTERY, SO A POWER FAILURE WON'T OPEN THE DOOR AND ALLOW CRITTERS TO INVADE.
THE LAST TWO PICTURES BELOW SHOW THE NEW STUFF. I SWITCHED TO 17-GAUGE ALUMINUM WIRE, AND A 10,000 VOLT, 2-JOULE CHARGER SOLD ON AMAZON UNDER THE NAME AgriOTTER. THE LITTLE 5,000-VOLT, 0.1 JOULE PATRIOT CHARGER WASN'T STRONG ENOUGH. A JOULE IS JUST A WATT OF POWER PER SECOND, MEANING THAT THE PULSE DELIVERED BY THE OLD CHARGER WASN'T LONG ENOUGH TO GET THE JOB DONE. THE AgriOTTER FENCER IS EXTREMELY POWERFUL. IF I TOUCH THE WIRES I GET A VERY PAINFUL JOLT. I COULD HOLD ONTO THE WIRE WITH THE 0.1 JOULE SYSTEM. THE BEST THING IS, THE AgriOTTER FENCER CAN RUN OFF A 12-VOLT BATTERY, SO A POWER FAILURE WON'T OPEN THE DOOR AND ALLOW CRITTERS TO INVADE.
